Posted on Leave a comment

Why You Need A Stretch Gauge For Engine Assembly

Assembling the bottom end of an engine requires plenty of precision, and if you neglect any details, the consequences could end up in your oil pan. Getting your rod bolts tightened down is the most important step in this process, and that means you really need to measure how you secure these fasteners. The most accurate way to do this is through a stretch gauge.

While using an impact wrench to quickly tighten a rod bolt down before you blast it with a few turns from a torque wrench might seem like a good idea, it’s probably the worst thing you can do. Every fastener used in an engine build has something known as a “yield point”— if you tighten it past this point, it will fail. The stretch gauge is the most important tool you’ll need when it comes time to start assembling the bottom end of an engine so you avoid exceeding a bolt’s yield point.

A stretch gauge is how you measure the preload of a rod bolt and ensure you’re installing it per the manufacturer’s instructions. Rod bolts, like those from ARP, will have dimples on each end where you place the stretch gauge to measure as you tighten the bolt down. Before you turn a wrench on the bolt for the first time, you’ll want to be sure you measure it so you can check its stretch as you tighten it down. From there, you just begin to tighten the rod bolts down per the procedure for your application while making sure you don’t exceed the recommended stretch amount.

Check out ARP’s website more right here to learn more about bolt stretch and how to properly install rod bolts with a stretch gauge.


Posted on Leave a comment

Supplemental Oil Pressure Can Save Your Engine

There is no denying, oil is the lifeblood of every engine. Whether it’s a tiny little 1.0-liter three-cylinder commuter engine, or a monster 1,008-cube Sonny Leonard behemoth big-block engine, without oil, both engines will turn into a paperweight in short order. Understanding that fact, it seems to be common sense that we should do everything in our power to keep our engines supplied with oil.

While that is a primary design goal of the engineers who design and build oiling systems, the fact is, things happen — especially when we modify or operate them outside of their original design envelope. Clearances open up, parts get damaged, internal components break — it’s just part of living in this imperfect world.

However, Canton Racing Products has set out to make sure that a single part’s failure doesn’t result in you bricking your engine. The Accusump oil accumulator has been around for quite a while, but isn’t “old technology” in any way, shape, or form. In fact, While the deceptively simple pressurized accumulator is the same as it was when introduced, modern electronics have given the Accusump an expanded range of installation and plumbing options.

The Basic Operation

First, let’s look at the basics of the Accusump, as the blue metal cylinder is deceptively simple. On one end of the cylinder is a gauge and a Schrader valve, and the other, either an electric or mechanical valve. However, if you were to cut the cylinder open, you would see where the magic of the Accusump actually happens.

Inside the cylinder, there are two chambers, much like a shock absorber. On one side of the piston is the engine oil, holding anywhere from 1 to 3 quarts of additional oil, depending on the model. On the other side is a volume of air at a specific pressure. In its most basic configuration — the mechanical valve — the side pressurized by air acts as a spring against the engine’s oil pressure.

Here are two common plumbing methods with the Accusump. The key takeaway from these is seeing how the unit feeds supplemental oil to the components which need it the most in the event of a loss of oil pressure. While these diagrams show a mechanical valve, the electric valve wouldn’t change the plumbing at all.

As engine oil pressure rises, that “air spring” compresses until the air pressure matches oil pressure, making room for oil in the accumulator. As engine oil pressure drops, the air spring expands, pushing some of the oil in the accumulator back into the engine. If there is a sudden pressure drop in the oiling system, say from a failed oil pump or a pickup running dry, the Accusump delivers its reserve of oil to the engine, while, hopefully, you respond appropriately to the sudden loss of oil pressure.

All in all, a simple, effective system to buy you precious engine-saving seconds in an otherwise catastrophic event. However, Canton realized that while this system is effective in motorsports where load and pressure are relatively constant — like drag racing or circle-track racing — the system had some potential shortcomings in areas where oil pressure was constantly fluctuating, like on the street or a road course.

“In those applications, there is a lot of transitioning [laterally and fore/aft] and your oil pressure is constantly fluctuating,” says Iann Criscuolo, sales and marketing manager and technical department for Canton Racing Products. That constant fluctuation in pressure means the volume of oil in reserve is constantly in flux, as well.

“If you need the system during a period of low pressure, with the mechanical system, you’ll have a reduced volume of oil available to you at the most critical time. In drag racing and circle-track racing you’re usually at a pretty steady oil pressure and it’s always there,” says Criscuolo.

The manual valve is a simple on-off affair. When closed, it’s closed; when open, it allows oil to flow in two directions through the valve. This works best in situations that feature a lot of constant load. Since this is a two-way valve when open, it constantly matches the engine oil pressure, and if oil pressure were at a low point when the Accusump was needed, the available reserve would be less than at full-charge. The remote valve opening and closing kit on the right is available, but is still less convenient than the electrical valve.

Electricity Makes Everything Better

To combat the potential issue found with a mechanical valve, Canton developed an electrical valve system, which adds some cost and complexity, but also adds an additional layer of controllability to the Accusump. Broken down to its simplest form, the system performs identically in principle, but instead of a simple quarter-turn ball valve, a more complex electrical solenoid system controls the gates.

“We have three different kits that activate with different pressures,” explains Criscuolo. “There’s a 20-25psi kit, a 35-40 psi kit, and a 55-60 psi kit. The lower number is the threshold at which the switch will be activated and dump the [accumulator] pressure into the engine. Then, once the engine reaches the higher of the two numbers, it shuts the valve’s output side, and then acts as a one-way valve to refill the Accusump.”

In addition to constantly maintaining a full load of oil in reserve at peak engine pressure, the electric valve is also a convenience issue. “Since it’s electric, you don’t need to manually open and close the ball valve every time you start the car and shut it off. It does that automatically for you,” says Criscuolo.

While Canton does make a remote activation kit, which operates much like an emergency brake cable, the electrical kit removes the chore of remembering to actuate the valve, because it can be wired into any ignition-on source, be it key-on for a street car, or master ignition-on for a racecar. “In my personal opinion, the electrical valve is my go-to, mainly for the ease of use. It’s just so much easier,” says Criscuolo.

The electric valves are interesting pieces. In addition to running off of a pressure switch, it opens and closes the valve at a predetermined pressure value. However, the neat feature is, that when “closed” it still functions as a one-way valve, allowing pressure and volume to build in the accumulator, so you always have the maximum volume and pressure available in the tank.

Pre-Oiling — A Side Benefit

One of the functions of the Accusump system, which we didn’t really cover, is that it acts as a pre-oiler. Whether you’re using an electrical or mechanical valve, the valve is opened before the engine starts. Because an Accusump holds pressure indefinitely, as soon as you turn open the valve, the reservoir dumps all the oil into the unpressurized engine oiling system.

The New Kid: The Turbo Oiler

With the unmitigated success of the Accusump, Canton repurposed the smallest model, and then halved its size, to make two sizes of the new turbo oiler — 0.5-quart and 1 quart. It’s long been known that shutting down a turbocharger after it’s been run hard, with no cool-down time causes the formation of waste solids in the turbocharger’s oiling system.

To battle the buildup of this “coke” as it’s known, the old-school method was an electrical “turbo timer” wired into the car’s ignition system to keep the engine running after the car was shut down, in order to keep oil flowing to the turbocharger while the system cooled off. An ingenious system, if not slightly unsettling, especially in a street car, where you leave your car running for a specified period while you run into the Qwik-E-Mart to grab a Bladder Buster and some beef jerky.

Looking to accomplish the same thing, but without needing to keep the engine running, Canton developed the Turbo Oiler. Using a similar principle as the mechanical-valve version of the Accusump, but without a valve at all, once the engine is shut down and the engine’s oil pump stops making pressure, the Turbo Oiler releases a metered flow of oil into the turbocharger oil feed circuit.

Similar in function to an Accusump, the Canton Turbo Oiler offers a supply of oil to the turbocharger for up to a minute after the engine has been shut off, giving the turbo precious time to cool down.

By maintaining that flow of oil to the turbocharger once the engine is off, the turbocharger’s rotating assembly is given time to cool off, while still receiving oil pressure and flow. This not only protects the bearings while the wheels spin down, but helps prevent the buildup of coke and other contaminants that form after shutting down a turbo without a proper cooldown period allowed.

Additionally, the Turbo Oiler provides the same protection to the turbo that an Accusump provides to the engine, in case of a loss of oil pressure. However, that feature should be used in conjunction with an Accusump, otherwise, you’ll just save your turbo, while your engine starves for oil.

Regardless of what form of driving you are doing with your vehicle, Canton’s Accusump products can give you precious seconds to save your mechanical investment in the case of an oiling system failure. In the case of the Turbo Oiler, you can also protect your turbocharger every time you shut down your engine, not just in case of a system failure. Either way, you’re buying insurance for your engine.

Posted on Leave a comment

What’s So Wrong With Nitrous?

Nitrous Oxide is a POWERFUL Oxidizer

Nitrous, or Nitrous Oxide is a power adder that provides incredible “Bang for the Buck” but for a number of reasons that we’ll explore today, almost never gets used, and that’s a shame because there’s really no better way to get a reasonable boost in power for peanuts.

Nitrous has a bad reputation for blowing up engines and is often even called “cheating.” Additionally, it gets a bad rap for not being “always available” and for needing refills to keep the power going.

All of these rumors have some basis in fact but as with almost anything, when used correctly, the benefits of nitrous are HUGE, especially for the target audience of this site: daily driven performance enthusiasts.

The biggest benefit of nitrous is that it provides enormous “bang for the buck.” You can purchase a nitrous kit, brand new for around $500 with everything you really need to start using it, maybe as much as $700 if you get all the bells and whistles, and instantly strap on 15, 35, 55, 65, 75, 125 or even 150 horsepower. The kits are usually pretty straight forward to install and the nitrous re1fills are about $40-50 or so at the time of this writing.

In a naturally aspirated engine, gaining 35-55 horsepower can be tough with any amount of money, and typically it costs more than the “fully loaded” nitrous kit (plus several bottle refills) to get even 15-20 horsepower out of your car. In most cars, a 10-20% improvement with bolt-ons can be had, but even a very low shot of nitrous can be worth significantly more, especially in otherwise low performance cars.

If you buy a second hand kit from someone, you have an even more price competitive solution. For example, I once bought a second hand “Zex” brand kit for about $200 locally which was good for a 55-75hp gain depending on jet settings and tuning. That’s enormous “bang for the buck”

So why don’t more people use nitrous?

Well, one of the rumors out there is that nitrous destroys your engine. However, this is completely untrue. Nitrous oxide is no more damaging to your engine than any other modification by itself, but like a turbo kit or add-on supercharger, the potential for blowing your engine goes up significantly due to the enormous amount of additional stress being put on your engine and the chances of running lean or experiencing pre-ignition due to heat.

You see, your engine can burn as much air/fuel as you can jam into the cylinders. The limitations are fuel delivery, spark plug/combustion chamber design and the physical strength of the engine itself to withstand cylinder pressures that can become quite high with forced induction solutions like nitrous, turbos, and superchargers.

However, nitrous is no more dangerous than a turbo or supercharger. To understand why, I’ll have to unpack what nitrous is a bit.

Nitrous is Nitrous Oxide, a gas which you may have been given if you’ve ever had surgery. It’s “laughing gas.” In the medicine field, it’s used to relax patients before procedures and is actually abused by some people for its euphoric effects. In an engine, nitrous is an oxidizer and to some degree a chemical/physical compressor of the air charge.

Oxidizers, for the purposes of this article, are compounds which provide dense amounts of Oxygen molecules to a reaction (such as the combustion of gasoline and air). Essentially nitrous serves as compressed air that is far more oxygen dense than the air around us. It is itself, not flammable, but under intense pressure and heat provides enormous “fuel to the fire” in your engine. Any time you detonate (not burn) a fuel like gasoline with an oxidizer, the resulting explosion is impressively powerful (for example, the combination of diesel fuel + ammonium nitrate, a different oxidizer are popular for demolition work and unfortunately also improved explosives in terrorism).

As we know, the more oxygen we can pack into a cylinder with the appropriate amount of fuel, the more POWER we can produce. Nitrous also super cools the air going into the engine as it is sprayed into the intake tract, this further allows more air and fuel to be packed into the engine with each rotation. In effect, this super chilling of the air is similar to the effect of compressing air by mechanical means (such as with a turbocharger).

The danger with nitrous, is the same as a turbocharger or supercharger, if you pack way too much air/oxygen in with not enough fuel, temperatures can sore inside the cylinder and cause components to melt/warp. To avoid that problem, we simply make absolutely sure that the air/fuel mixture is relatively rich (lots of fuel to keep things cool) and we do everything we can to avoid pre-ignition by running conservative ignition timing of either stock values or slightly “retarded” values.

The reason that engines fail with nitrous are the same that engines fail with boost. There is nothing particularly dangerous about nitrous, other than that people don’t often treat it with the respect that they do a turbo for example. Treat it with respect and keep your power gains reasonable and you shouldn’t have any troubles with nitrous.

Next is the idea that nitrous is “cheating.” I suppose it is if it’s against the class rules in your racing class, but for a street car, it’s absolutely not cheating. In a street car, or an occasional “for fun” dragster or something, I don’t see any problems with it. If the end goal of a high performance street car is to give the driver some enjoyment for a minimum outlay of cash, then nitrous might be a great way to do that.

As for the “not always available” argument, that’s very true. If your bottle is empty, you will have to refill it, that is true. However, if your gas tank is empty or you have no oil in your engine, it doesn’t matter how much power you have normally, your car still isn’t winning a race now is it? Same is true for nitrous, it’s just an additional “fuel” that you need to run the car at its optimum performance level, no big deal.

The thing about nitrous that makes it unique compared to other forced induction solutions as well as all motor techniques, is that it produces torque (POWER) – instantly. Whereas a turbocharger produces variable amounts of additional torque based on how much boost it’s producing, nitrous instantaneously adds torque with no lag. For this reason, even in high powered turbo cars you’ll often see nitrous added to make up for turbo lag caused by the enormous turbocharger and get the car into boost faster.

It doesn’t matter if you’re at 2500rpm or 8000rpm, you’ll still get gobs of torque with nitrous. Typically, this means that given the same peak power output, the nitrous car will beat the all-motor or turbo/supercharger car, all else being equal and traction dependent.

As for long term cost effectiveness, it depends on how much power you’re looking to add. If you’d be happy with a 35-75 horsepower gain (which is usually somewhat conservative), then a 10lb bottle in a daily driver can last for MONTHS depending on your driving habits, jet settings, and if you have it always ON or if you only use it when you really just want a laugh. Refills aren’t that expensive in the grand scheme of things and there are a lot of refills before you buy a comparable turbo kit even when you consider the kit cost.There A LOT more refills before you build a comparable “all motor” build.

Once you go over 75hp or so, I begin to see the cost effectiveness argument, but it depends on the expected use of the car and the cost of the comparable turbo/supercharger components to get there. With 75-150hp settings you can always install a second bottle to get more time before refills, the 25 pounds for the entire kit are highly offset by the 75-150 hp gain, are they not?

If a fully loaded (all the gizmos, bottle heater, rpm window switch, etc) “basic” kit costs around $800, let’s say. Then let’s say you can get an awesome deal on a complete turbo kit (that’s actually complete and not just some eBay “some modification” required kit) for $2000. There is a $1200 spread there. There are 24 bottle refills between the two options if a refill costs $50. The odds are good that no matter how much you drive hard, you won’t go through 24 bottle refills in the time you own your car.

Bottles of nitrous do go fast at the drag strip, typically you’ll see a bottle last about 8-10 solid runs at a lower nitrous setting (around 55hp), or roughly about as many runs as you can get at a typical test-n-tune event anyway. The thing is, very few people actually go WOT for a full quarter mile on the street, so the length of time the nitrous will last is actually quite significant, especially if most of your “WOT runs” are on on-ramps and to pass people on the highway.

Nitrous can be used with nearly any build. It works great with other power adders (such as turbos and superchargers) and it is not incompatible with most “all motor” setups.

Nitrous kits are also nearly universal, in other words, if you buy a 4-6 cylinder kit, it can be used with nearly any 4-6 cylinder car you ever purchase. Of course, that’s not true of nearly any other power adding solution, so you can keep your kit and upgrade your kit from car to car. In the long run, this makes it significantly less expensive than other options, even if you add in the cost of nitrous refills.

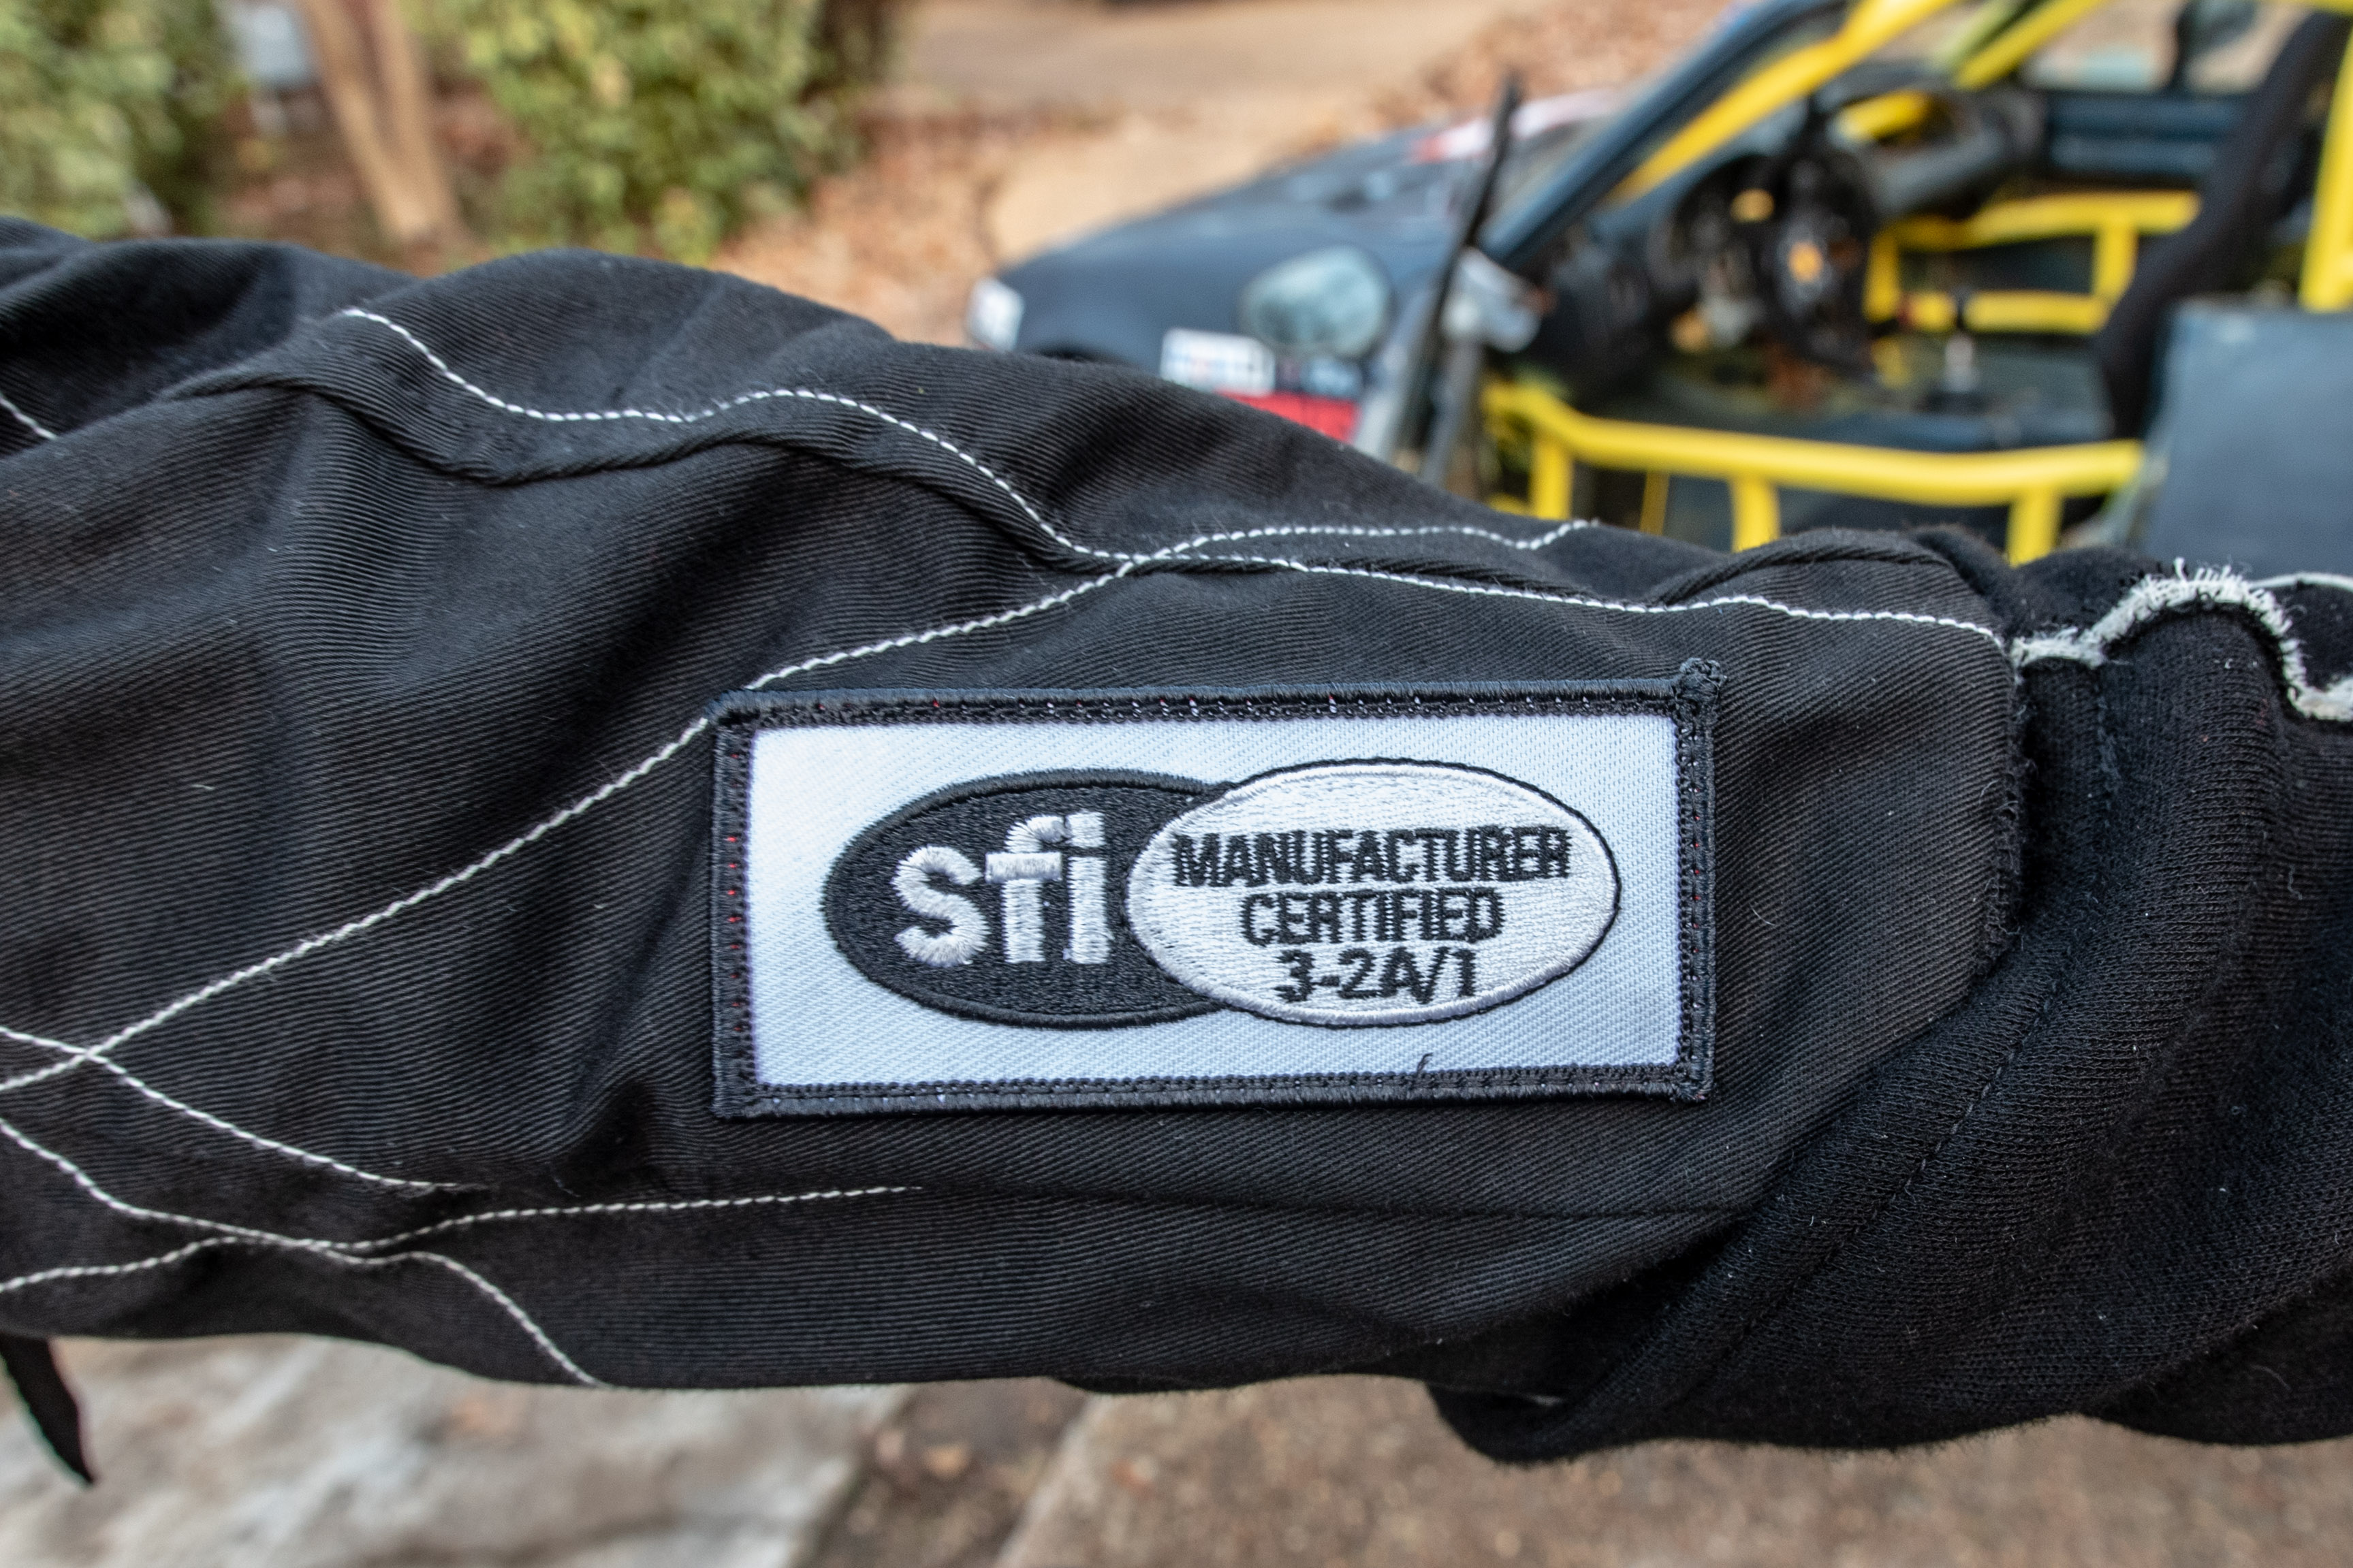
Safety and legality is one concern that needs addressing. Nitrous is not without risk. Compressed gas has to be treated with respect. A punctured compressed gas container can become a rocket, and excessive heat can cause a compressed gas container to literally explode. The amount of heat needed can only come from an external source, but it’s important to understand this risk and do everything you can to mitigate it. If you are going to use nitrous, the bottles should be in the trunk. Check your local laws because in some states it is illegal to have nitrous in the vehicle, in others it’s legal with certain rules (can’t be open/hooked up), and in others there are no regulations on the books at all. I am a safety fanatic, so with nitrous I believe it should always be very firmly mounted in a place unlikely to be damaged during an accident (close to the trunk firewall, towards the center of the car, for example). There should always be a plate of steel that separates the bottle from the passenger compartment. When wiring bottle heaters and other electronics related to your nitrous, always follow directions.

One important note is to always ensure that all nitrous components are on switched 12v sources so that they are only turned on when the engine is running. This is particularly true of bottle heaters. Bottle heaters have safety mechanisms implemented into them, however, always have additional fail safes. Ideally, a switched 12v source powers the electronics but additionally requires the user to activate them for them to turn on.

I think it’s always a good idea to have a fire extinguisher in your vehicle anyway, it’s particularly true when running power adders of any kind. If a fire should ever occur, only attempt to put it out if it’s small and the source is known. Otherwise, get away from the car immediately. Cars can be replaced, you cannot.

The only reason to perhaps consider only one bottle instead of two, is safety. Less oxidizer in the car and fewer bottles do reduce the odds of an accident occurring.

Finally, nitrous has essentially no effect on fuel economy. Sure it uses more fuel when you’re using it, but only when you’re using it. Turbos are also great about producing great power without negatively effecting daily driving fuel economy. However, nitrous is ONLY activated at wide open throttle, so it only activates when you’re asking the engine for all available power. Turbos however will use more fuel anytime you tip the throttle far enough to get into boost. That’s a fine trade off for most people, but it is a plus in the nitrous corner.

So, while some common sense safety measures are necessary with nitrous (or really any significant power adders), it’s actually a pretty cost effective way to add some fun to your daily driver.

If all your looking for is a nice “bump” in your car’s performance, then honestly it’s hard to beat it.


Posted on Leave a comment

How to Compare Weight Savings to Horsepower Gains

How to Compare Weight Savings to Horsepower Gains

Have you ever wondered what 10 or 20 extra horsepower might “feel” like in your car?

Maybe you’ve wondered how removing 100lbs will affect your car in terms of how much horsepower you’d have to gain to accomplish the same thing.

These questions are wise to ask because they can be used to make significantly better modification choices and frankly it can be fun to “simulate” different modification scenarios.

For example, if I could buy a carbon fiber hood that weighs 20lbs less than factory, it’d be nice to be able to view that weight loss in terms of horsepower. In other words, how many horsepower would I need to gain in order to accomplish the same thing as losing 20lbs? (Hint: it’s pathetically little)

What if I wanted to determine if a dual exhaust system is worth while? How much more power would I have to make to offset the extra 20lbs? (in a 3500lb car with 215 hp, not even 1.25hp, so probably do-able)

Can someone on the forum claiming to feel a 1-2hp gain on their butt dyno really do so? Well, using this formula you’d see that they’d have to be able to feel the difference between having groceries in the car vs not having groceries in the car to “feel” that supposed gain.

What about if I wanted to see how much weight I’d have to lose to compete with the same car with 50 extra horsepower?

All of these kinds of questions can be answered with the simple math in today’s article.

Weight to Power

You’ve probably heard power-to-weight more than weight to power, they’re the same thing but one has nicer numbers and a better visual representation so I’ll be using weight to power for this discussion.

Weight to power is one way to get a general idea of acceleration performance. For example, if I have a 3500 lb car with 215 horsepower, I simply divide 3500 by 215 to get a weight to power ratio of 16.28 lbs per horsepower. The same car with 250 hp would have a weight to power ratio of 14 lbs per horsepower.

To give you a really over simplified visual, imagine that each “horsepower” is a horse. The fewer pounds the horse has to drag with it, the easier it is for it to run.

The Bugatti Veyron with 987 bhp and a curb weight of 4,162 lb has only 4.12 lbs/hp and thus is significantly faster than our example car.

Great, that’s all very simple. So how is this useful beyond comparing vehicles to one another?

Well, let’s go back to the 3500 lb car with 215 horsepower example. Let’s say I want to know how losing 100lbs would translate into horsepower gained, because let’s face it, most of us think in terms of horsepower gains.

So we take 3500 lbs (the original weight) and divide by 215 to get 16.28 again (rounding for simplicity, you’ll want to use the full number to get accurate results).

We take 3400 lbs (the new weight) and divide by 215 to get 15.81 lbs/hp. That is better of course, but what would that mean in terms of horsepower? Well, we do some simple Algebra to see what horsepower we’d have to have with the original weight to get the same weight-to-power. Stick with me as this is really cool/useful:

3500 / x = 15.81 (Non-geek translation: original weight divided by some unknown horsepower would give us the same power-to-weight ratio as 3400 / 215). Solve for X (which I have done for you below)

“Weight loss” to “Horsepower” Formula

Old weight (3500) / New Power-to-Weight Ratio (15.81) = 221.38 hp

So that means that by taking 100lbs out of the 3500lb car, we would have had to gain ~ 6.38 hp (221.38-215, (the new-original horsepower) to accomplish the same thing WITHOUT taking out the 100lbs. Thus in this situation, 100lbs is roughly the same as if we had done something to gain 6.38hp. So to some extent, this means that something like an intake that adds +6hp would FEEL kind of like losing 100lbs (or a very skinny passenger) in this particular vehicle. In another car with different weight and power numbers, this figure would be different but calculated in the same way.

“Weight Gain” to “Power Loss” Formula

You can also use this same method to determine how adding weight is hurting you in terms of theoretical power loss. So if I add 50lbs of stereo equipment to the same car, it’s

Old Weight (3500) / New Weight-to-Power Ratio (16.74) = 209.08 hp

So that 50lbs of equipment is LIKE losing a little under 6 hp as those horses will now be dedicated to hauling that 50lbs.

This will give you a new way to think about weight and power. You can also go the other way and see how power gained changes the car in theoretical terms of weight, though I find this less useful. To do that, you say a 3500 lb car with 215 horsepower has a 16.28 lb/hp power-to-weight, and let’s say we gained 50hp to get up to 265 hp. That’s a power-to-weight of 13.2 lbs/hp. Now it’s simple Algebra again to figure out how much weight I’d have to lose off the car to make up the same amount of power:

In formula form:

New Power to Weight (13.2) * 215 (old horsepower) = Theoretical Weight (2838).

So 50 horsepower in this particular vehicle would be roughly the same as shaving off 662 lbs. As you can see from this math, this is why losing weight is rarely as useful as gaining horsepower, or at least, horsepower gain is significantly more practical and cost effective than weight loss in a production car.

Of course, this is also if we only take into consideration the acceleration effects of weight and power. In road racing or in a daily driver, weight loss is more useful than in drag racing. Of course, regardless of our goals, the least amount of weight necessary is best.

Hope this helps!


Posted on Leave a comment

Keep Your Engine Alive: The Importance of Oil Temperature

One of the things you will find if you have a oil pressure or temperature gauge is that regardless of the fact that oil is running through your engine and cooling it just like the coolant – it takes on and loses heat differently than coolant.

Oil temperature is probably the most important thing to know, specifically for those of us who are pushing our cars hard. Free reving (or worse – racing) on an engine that has not fully reached it’s oil operating temperature is extremely dangerous. But don’t think that the coolant gauge will tell you this information – it won’t.

As a general rule of thumb, after the car is warmed up, oil tends to be a few degrees warmer than the coolant (usually 10-15 degrees Fahrenheit).

However, it takes much longer for oil to come up to temperature than coolant. When you start your car in the morning, most of us are wise enough to not romp on the car until the coolant gauge is up to operating temperature. This is certainly better than romping on it cold, but it’s still not quite ideal.

You see, the oil, especially in colder ambient temperatures, takes several times longer to come up to temperature.

Oil will not get to complete operating temperature easily by simply idling, it requires driving around and putting SOME load on the engine. I see people in the pits at races all the time reving their motors to ‘warm the engine up’. It won’t do any good and is only putting premature wear on the car.

The best way to get a car’s oil temperature up is to simply drive it around for a few minutes. Ideally you’d have an oil temperature gauge to tell you when it’s at operating temperature – and oil pressure gauge (lower pressure) would also tell you this information.

What’s the danger of running an engine cold?

Total engine failure.

Well, that may seem a little extreme, as certainly all of us have run a engine that was cold, hard. We probably even got away with it due to the amazingly good engine design we have today. However, it’s an extremely risky thing to do and can easily result in catastrophic engine failure. ESPECIALLY in highly tuned, built engines.

If the engine is way too cold (ie, the coolant hasn’t even come up to temps), it’s not making its ideal power either. VTEC engines actually do not engage VTEC unless the coolant is up to temperature, for example – this is true of many other variable valve timing technologies as well. Think of it as Honda trying to save you from yourself.

In  all engines, the engine’s clearances are significantly tighter, creating extreme amounts of stress on the engine’s internals and the piston rings will not have properly sealed with oil temps too low.

In short – it’s really bad for your engine to run it hard until it’s OIL is completely warmed up. Coolant temperature is a false indicator.

Practical Advice

So without going out and buying an oil gauge and all that, what’s the big take away from this discussion?

When you first start running your car for the day, make sure to keep the revs low and take it easy for at very least the first 5 or so minutes of driving, longer in extreme cold temperatures. Most importantly, and least obviously – don’t trust your coolant gauge to be a good indicator that your engine is fully warmed up.

In cars with oil coolers that utilize the coolant to cool (used on many imports, sandwhiched between the oil filter and the block), the oil temp will actually come up with the coolant as an added bonus to keeping oil temperatures cooler under high loads.

If you’re putting gauges in your car, you might also consider an oil temp or pressure gauge as it can be a real tool in assessing the load on your engine and keep you aware of situations that might harm the reliability of your engine. This is especially true in turbocharged engines or on high speed circuits as engine oil can actually cook if it gets too hot, ruining it’s lubricating properties and resulting in – yep, engine failure.

Remember, an engine fully warmed up but not heat soaked creates optimum power. In the real world, this means when you’re driving down the highway and the engine is plenty warm and the airflow through the engine bay is taking warm air from the engine bay out through the bottom of the car. Never try to get a better time at the drag strip by running with cold engine oil and never try to warm a car up by reving the engine.

Keeping this advice in mind will certainly keep your engine alive much longer and prevent you from having a really bad day.

Posted on Leave a comment

Low Temp Thermostats: What’s the Advantage?

This week we’re talking about low temperature thermostats, another item that nearly every tuning house sells and yet fail to really explain what they’re for. A few months back, we talked about high pressure radiator caps and what advantage they offered, this time though we’re looking at a part that is far more perplexing.

Here are a few descriptions from websites/manufacturers selling these, notice the trend of extremely vague language:

The SPOON Low Temp Thermostat S2000 Integra Civic will increase the vehicles cooling ability (false) by changing the operation temperature from 90C (stock)[194] to as low as 80C [176F]. This in turn will give your Honda a chance to be free of overheating (false). For best results, it is recommended that the Thermostat be used in conjunction with a low temperature Thermo Switch.

The SARD Low Temperature Thermostat – SST12 Mazda is a drop-in direct replacement for your OEM unit. The Sard unit will lower the temperature at which the cool water can mix with the warmer temperatures inside the engine (true). This will lead to a motor than can now run much more efficiently (false).

The FEEL’S Low Temperature Thermostat Civic FD2 will provide better, more reliable and faster cooling for your FD2 (false). By lowering the opening temperature to 68 degrees, and full open at 82 degrees there is a smooth transition in cooling (???), and you engine will be cooled optimally faster (?).

The MUGEN Low Temp Thermostat NSX S2000 will increase the vehicle cooling ability (still false) by allowing the circulation of the chilled water earlier than the OEM unit would allow it to (that part, true). Stock thermostats are intended for normal driving conditions and aren’t made for those intending to give their car a work-out (false).

Reading these make you believe that a low temp thermostat are a good idea for those “pushing their car harder” and that they somehow improve cooling performance. There are other descriptions that also seem to indicate that they lower engine/intake temps to make more power. All rubbish.

The Function of the Thermostat & Cooling System Basics

The biggest misunderstanding about thermostats is that people believe they make the engine run cooler. They don’t necessarily do that. The cooling system and load on the engine determines how hot the engine gets, the thermostat fully open will still be the mercy of the coolant system’s ability to remove heat.

Most engines run slightly above the thermostat’s minimum opening temperature under normal loads. Under high loads, they will run at or above the thermostat’s fully open temperature – in other words, under hard driving, the thermostat’s opening temperature is completely irrelevant.

The thermostat can only determine when the cooling system is allowed to start cooling the engine. It sets a floor, not a ceiling on engine temperatures. The thermostat basically behaves like the hot and cold knobs in your shower, if the water is too hot, it turns the cold on a little more and if the water is to cold, it turns up the hot water.By regulating the flow through the cooling system it speeds up and slows down the flow of coolant into and out of the engine block.

In liquid cooling systems, the ability to cool is determined by a number of factors, but the basic keys are the surface area of the radiator (how big/how many small fins), the air flow through the radiator (fans on/off, speed of car), and how quickly or slowly the cooling fluid goes through the radiator. If the coolant spends a small amount of time in the radiator, it loses less heat. If it spends a lot of time there, it loses far more heat. Therefore you don’t want the flow to be too high as the cooling system’s ability to cool the engine will be reduced, not increased.

The thermostat is there primarily to help the engine warm up in the morning. As we discussed in a previous article, the engine is designed to operate at it’s operating temperature. Most engine wear occurs when the engine is cold, once it’s warmed up there is very little wear in a healthy engine. Thus, we definitely want to run a thermostat to allow the engine to warm up as quickly as possible until it reaches our desired and designed operating temperature.

If the engine is below operating temperature, the bearings, rings, and other components are not yet expanded in size and therefore they “bang” against the other metals in the engine more than they would at operating temperature. No good.

So if we don’t run a thermostat at all, it takes a lot of constant load to get the engine properly warmed up and to keep it up to temperature on cold days. We also in some circumstances may experience overheating if flow through the system is too high as the coolant has to spend a certain amount of time in the radiator to actually cool down.

Some race teams do choose not to run a thermostat, but they are the minority. They usually run at least a restriction plate in place of the thermostat to slow down flow and allow some warm up to occur.  The reason that they may not run one at all is usually to remove a point of failure in endurance type races. In other words, if the thermostat fails and sticks closed, it could cause a pit stop or end the race. By removing it, they tolerate possible engine wear since they know they’ll be at high loads throughout the race. Their cooling system is usually tuned to compensate for the lack of a thermostat as well.

Running the factory thermostat will on the other hand ensure that the engine comes up to the designed minimum temperature very quickly. Until the engine is up to temperature, there is no cooling occurring. The factory thermostat will not however change how the engine runs under load because the thermostat will be fully open when under load. It effectively isn’t there under load.

What they’re used for

So what then would a low temperature thermostat accomplish? Not much.

Around town and in the pits, you warm up faster than no thermostat at all, but you will take a while to warm up from 160 to 180 for example. You will get there however, especially on warm days, the only difference is you’re trying to cool the car off as it’s trying to warm up. As a mater of fact, if you sit there at idle, the temp will go up until the radiator fans kick on since radiators are poor cooling devices without air flow. In other words, sitting still, the thermostat opening temperature doesn’t matter much at all.

Once you’re moving, on the highway, with a 160 degree thermostat on a cooler day you could be cruising at 160-180 degrees (opening temp->designed operating temp). This is possible because the load on the engine is low and the outside temps are low. Therefore, the thermostat opening temp maters somewhat here. If you’re coasting down a mountain, it will be a certainty that your coolant will reach the thermostat minimum if you coast long enough.

The problem with a low temp thermostat then for regular driving is that there are times when the car will be running at a temperature lower than it’s design intended. The result is increased wear on the engine’s internals. It’s essentially the same as if you assembled the engine with clearances tighter than designed for because you didn’t follow the directions or your tools were not calibrated properly.

As for the intake temperature argument, while cooling the intake manifold down could be useful, there are a few problems with the argument. The first is that very little heat is transferred from the intake manifold to the intake charge, period. The intake charge is moving very fast and there is a LOT of air flowing through. The surface area of the intake system is very small and the temperature differential in real terms is not that high. There is already very little heat being added to the intake charge by the intake system regardless of what some ads claim. If the new thermostat DID bring the temps of the intake manifold down 20 degrees, the actual change in intake temps would be negligible to 0 on the road.

Regardless, it would take literally a second or two before temps would be regulated by the cooling system, not the thermostat anyway since under load the engine is going to run well above the thermostat fully open mark anyway.

Remember that the thermostat is fully open pretty much any time the engine is under full load because the coolant temperatures spike pretty quickly.

In a race car, the floor (opening temp) of the thermostat is completely irrelevant unless you are running a very efficient and large radiator. Once you’re out on the track for half a lap or so, your coolant temps are going to be in the 200 range anyway so the thermostat is fully open regardless.

You can use a low temp as a “band-aid” at the track sometimes. For example, if you know that your coolant temps are hitting the opening temp of your current thermostat at points the track and you’re experiencing mild overheating, you might be able to patch this up by using a lower temp thermostat, especially if you’re willing to run your radiator fans manually to help.

Why? Because during low load parts of the track you allow the coolant system to cool off more which means it will cope with higher load sections a bit better and may chase of mild overheating problems. This is acceptable on a race track as a temporary solution as wear is usually an acceptable compromise to get through the race. However, the right solution is to upgrade the radiator or check for possible malfunctioning sections of the cooling system. It is also more acceptable here because load is high during a race. On the street, even on hard drives, it’s usually reasonably low.

Conclusion

So if you want to test this, the best thing to do is get an OBDII scanner and go out in an OBDII car and monitor the ECT sensor and watch how coolant temps regulate and spike as load changes.

The bottom line however is that in a street car, you’re increasing wear and getting no benefit. In a race car, it’s a band-aid but not one that you should plan to rely on.

If you’re having overheating problems, check the cooling system thoroughly and if all is well, upgrade the radiator, fans or even the water pump — not the thermostat. If your coolant gauge never goes above normal then your cooling system is adequate for your use of the car.

If you’re chasing more power, this isn’t a place to look. Any power gain would be circumstantial (ie, only under certain conditions), incredibly negligible, and at the risk of accelerated wear on your expensive engine internals (especially in street cars).

Posted on Leave a comment

Beating the Heat: Advantage of a High Pressure Radiator Cap

High Pressure Radiator CapSpoon, Mugen, TRD, and about two dozen other ‘big name’ companies all sell these “High Pressure” radiator caps. However, if you ask the average person what they actually do, you’ll be met with cricket chirps.

Most imports use 1.1 kg/cm2 radiator caps while these aftermarket pieces are typically 1.3 kg/cm2. These caps are also available for domestics and some exotics as well, but the same principle applies regardless of the make/model of car. Sometimes they are rated in the “bar” unit.  The conversion factor is 1.02, so for the purposes of this article, because kg/cm2 is more awkward to write, I will say 1.1 bar and 1.3 bar. 1.1 bar is nearly exactly equal to 1.1 kg/cm^2. So, yes, I realize import caps are rated in the metric unit, but I’m going to use bar instead to make my writing a little easier.

These caps look cool, and they’re sold by big names – but let’s look at what they actually do and why you may or may not want one.

A Little Technical Background

To understand why the higher pressure radiator caps might be useful, we first need to understand something about the fluid inside the cooling system.

In an ideal world, engines would be cooled by straight water with no antifreeze added. Water is an excellent cooling agent and is extremely efficient at carrying heat away from the engine and then exchanging that heat with the air via the radiator.

However, water has a few properties that make it imperfect as an automotive coolant. For one, it has a relatively high freezing temperature at 32 degrees Fahrenheit. Freezing would be bad enough but water also has the unique property that it expands at its freezing (which if you’ve ever left a soda in the freezer before, you know why that’s bad). It also has a relatively low boiling point at 212 degrees Fahrenheit.

Since most engines are operating at a temperature of around 185-205 degrees, that only gives us a small amount of wiggle room before boiling would occur. Boiling is bad for a number of reasons which I won’t get too into here, but, steam/bubbles in coolant actually insulate coolant from the combustion chamber and would render the coolant useless at cooling the hot engine. It can also cause water pump failures amongst other damage via a process called cavitation.

Water is corrosive and it will gradually eat away at seals and cause metal inside your engine to deteriorate. Finally, it isn’t a very good lubricant and the water pump and seals in your cooling system rely on other compounds in your coolant to provide those properties.

So, we generally add antifreeze to distilled water to create the coolant we run in the car.

Antifreeze both keeps water from freezing in the winter (by lowering the freezing point of the water) and at the same time raises the boiling point of the water. A 50/50 mixture as we typically use actually gives us a freezing point of -35 degrees Fahrenheit and a boiling point of 223.

The trade off for the extra wiggle room of course is that antifreeze is not a very efficient heat exchanging fluid. In fact, 100% antifreeze in your cooling system would be an absolutely terrible idea. When you add antifreeze to water, the ability to cool evenly and quickly drops. Besides that, up until about 60% coolant, you do gain boiling point and freezing point. However, past 60% coolant to water, you start to go the other way again, sharply.

While we’d love to run 100% distilled water in the cooling system, we can’t because of corrosion and boiling/freezing points. We also don’t want to use 100% antifreeze because it would be a poor cooling fluid. Therefore, we need a compromise, which is usually a 50/50 ratio of the two fluids mixed together.

The Role of Pressure

But, back to the radiator cap. As the coolant gets hot it expands creating pressure in the system. The hotter things get, the more pressure created. The radiator cap allows pressure to build up in the cooling system and will eventually vent that pressure to the overflow bottle as the need arises. The cap does this by a spring loaded valve which serves as a pressure relief valve at a rated pressure. You’ll notice that there’s a plunger on the bottom of the cap. As pressure builds, it pushes up on that valve until eventually the valve is opened far enough for coolant to flow out of the tube connected at the radiator fill neck. It closes again when the pressure has dropped to the desired level.

This tank is there just to catch the coolant and store it until things cool back down, when a vacuum will be created and most of the coolant will return to the cooling system.

Pressure actually increases the boiling point of a fluid as you may know from high school physics class. The pressure literally forces the liquid to remain a liquid longer and does not allow it to transform into vapor. All modern automotive cooling systems are under pressure, completely regulated by the radiator cap. 1.1 bar is roughly 15psi, and 1.3 bar is around 18psi.

How much does the pressure raise the boiling point? Well, it’s about 2-3 degrees for every psi that we increase the pressure of the system. Therefore, by using a 1.1 bar cap we make the average boiling point of a stock cooling system somewhere closer to  around 257-260 degrees.

When we change from a a 1.1 bar to 1.3 bar cap, we gain 0.2 bar or roughly 2.9psi of pressure. So, we effectively get 8.7 degrees (or around that) on top of the 257-260 degrees  before we might experience boiling coolant in the system.

So if some extra pressure is good, why not a lot? Well, it may seem obvious, but the cooling system on your car is rated to a certain pressure. The radiator cap is designed to be the weak point in your cooling system so it can safely vent pressure, you don’t want to use a cap that is so resistant to venting pressure that it causes some other part of the system to become the weak point.

What does it DO for you?

Under normal operating conditions, with everything else untouched it gives you a small amount of extra protection against localized boiling and therefore hot spots in the cylinder walls and cylinder head. If you’re running a 50/50 ratio of antifreeze to water and aren’t overheating, there is no real measurable benefit.

However, when mixed with a slight change in coolant, these caps can actually add quite a bit of cooling efficiency to your car, especially for hot summer track days. It’s a cheap tweak that can give you some extra insurance against engine failure or detonation in extreme conditions, or, make you legal to be on certain tracks.

What these caps can be used to do, is run  less antifreeze and more distilled water in your cooling system in the summer. It can also be used to run nearly straight water and water wetter (an additive which… increases the wetting ability of water.) for the track. The benefit on the track being two-fold. Some tracks do not allow you to use antifreeze as it is literally slick as snot if it leaks or spews onto the track. The other benefit is that straight water as we discussed before is the most efficient cooling fluid. Add a product called Water Wetter and that can be a really powerful combination.

So let’s get to the point…

Remember that a 50/50 ratio of coolant has a boiling point of 223 degrees. Straight water has a boiling point of 212 degrees. Both however are boosted significantly by the pressure in the system. A standard 1.1 bar cap adds 48 degrees to the boiling point of either fluid. So the coolant in your car will not actually boil until ~260 degrees, or ~271 degrees if it has antifreeze mixed in. Adding the additional 0.2 bar of pressure gives us another 8.7 degrees in both cases.

By upping our cooling system pressure to 1.3 bar we gain about 8.7 degrees. Antifreeze only adds 11 degrees to our boiling point, so the main reason for running a 1.3 bar cap is to run straight distilled water (with water wetter to prevent corrosion) or a significantly reduced antifreeze ratio without danger of boiling over. Specifically, in the summer months.

So why not run it this way all the time? Well, let’s not forget the freezing point. While the pressure cap trick gives us a higher boiling point, it does not a thing for freezing point. If your area doesn’t get down to negative temperatures in the winter, you can run a decreased ratio of antifreeze to coolant if you like all year round. However, I’d still run 50/50 in the winter. The good news is, in the winter, there’s less need for excellent cooling as air intake temps and ambient temps help you out a lot more than in the summer.

So Should I Get One or Get Rid of Mine?

Water WetterWell, they’re generally inexpensive, around $20-30. I would never pay more than maybe $40 and really, you can get just about any old 1.3 bar cap that fits for around $10 that will do the job just fine.If an OEM tuning house sells one for your car, you may want to go with that one – the cap is simple but it’s extremely important it functions properly. OEM quality is important here.

They are a small amount of insurance against possible overheating, especially for tracked cars or for excessive idling in the hot summer months. Add another $10 for a bottle of water wetter as well. For a daily driver, the extra pressure would only be particularly helpful if running a modified coolant ratio. Installing one won’t hurt anything. If you ever do approach boiling point, they’ll give you a little more insurance against it, and they’ll keep the coolant doing its job longer before the bubbles in the fluid create problems.

For a car that sees track time, specifically road race time, it would be a good cheap upgrade to your cooling system. Especially when mixed with the straight distilled water+water wetter or reduced antifreeze ratio combo.

If you do run straight distilled water, make sure you put water wetter in with it, or you will create corrosion problems and the water wetter will make the distilled water more efficient as well.

In particularly hot areas with engines that are running high compression or boost, a 1.3 bar radiator cap, water wetter and a reasonable coolant ratio or distilled water setup would be a good “stock upgrade” to help prevent detonation. Granted, if your engine is fairly close to stock, you don’t need to worry about detonation as long as you run the right fuel as dictated in your factory service manual.

In closing, if you want to run the same setup all year round and want to be extra safe, run 50/50 antifreeze with Water Wetter (it improves coolant efficiency and especially helps evenly cool the cylinder head), add a 1.3 bar cap for good measure.

In a later article I will discuss other common ‘coolant system upgrades’ like low temperature thermostats, fan switches, as well as if/when you should upgrade your radiator.

Posted on Leave a comment

I-Beam and H-Beam Connecting Rods Explained

Connecting rods are probably one of the easiest parts to understand in an engine — they have to make sure the pistons are moving up and down when the crankshaft tells them to. Where things start to get complicated is in examining the design of a connecting rod and determining the best option for your uses. There are two main choices when it comes to connecting rods: I-beam and H-beam, and in this article, we’re going to look at the difference between the two, along with the ideal engine application for each.

I-beam and H-beam connecting rods are the most common types of rods you’ll find in high-performance applications because they are so versatile. Every engine is going to be different, so having the option to use a connecting rod that best matches what its intended goals are is very important. When you drill down further and look at each rod type, you’ll see there are different design elements put into each that help optimize them for the build they’re used in.

Rod School: What You Need To Know

When you put an I-beam and H-beam connecting rod side by side, it becomes obvious how they got their names. The I-beam rod has a very robust appearance with a thick cross-section. Looking at the H-beam rod, you will notice that it has large sides that are flat with a thinner section in the middle that makes it appear like the letter ‘H’. These design differences are striking on the surface, and they each have an important purpose when it comes to how the connecting rod is used.

I-beam and H-beam connecting rods are easily identifiable because of their unique shapes.

The design of the connecting rod is just part of what makes it the right part for the build; you also need to ensure the material it’s made from is of the highest quality. Nick Norris is part of the engineering team behind the design of connecting rods for Callies, and he explains why the material is the most important thing to look at when you select a connecting rod.

“By using a higher quality material it helps to limit the number of failures you will see. Over the years we have seen rods go through a hydraulic situation where the rod is basically turned into an S-shape. If the material wasn’t as good as it was the part would have broken. Now, it’s not ideal the rod is S-shaped, but that’s better than the rod completely failing and trashing everything inside the block. We use a 4330 material to make our rods — by using a better material we can take advantage of making parts a little bit lighter than a rod that’s just made of regular 4340 steel,” Norris says.

It’s easy to understand why you need a connecting rod to be made of the best material possible, but why do they come in different shapes? The answer to that question is actually pretty simple: it comes down to what you’re trying to accomplish with the engine. While both I-beam and H-beam connecting rods can function in the same settings, one will work much better than the other based on the application.

“The shape of the connecting rod has to do with the builder’s preference and what application the rod will be used in. The H- or I-beam design will work in most applications, however, if you’re building a high-boost application the I-beam is better. The reason being is the I-beam is a better rod when it’s under compression compared to an H-beam. If you overload an H-beam rod with compression, the blades along the H-beam shape will actually start to spread out,” Norris explains.

H-beam rods are perfect for engine builds where every ounce counts.

Breaking Down I-beam and H-beam Connecting Rods

We’ve given you some basic information about I-beam and H-beam connecting rods and now it’s time to take a closer look at each. As mentioned earlier, you can easily make either of these connecting rods work in any application, but if you’re trying to fully optimize a particular build you need to know which is going to function better. Using the right rod for your particular build will not only save you some headaches when you’re trying to select parts, but it will also save you from a costly parts failure that could do serious damage to your engine.

The I-beam rod lends itself better the higher compression loads, partially because of the shape up around the pin area. – Nick Norris

Let’s first take a look at the I-beam connecting rod. The I-beam design works best in a build where a power-adder is being used because the rod offers additional strength. You’ll see I-beam rods almost exclusively in engines that are designed for high amounts of boost because of its design. This is due to where the weight is added to these connecting rods among other reasons.

“The I-beam rod lends itself to higher compression loads partially because of the shape up around the pin area. We have a unique shape where the pin is located that’s almost like a gusset. Where the beam transitions on the pin end we create what I call a slope up that supports underneath the pin all the way to the outside edges of the pin bore,” Norris states.

If you’re trying to make a lot of boost, an I-beam connecting rod is the best choice.

When you need to lighten up the rotating assembly the H-beam connecting rod should be at the top of your list. These rods are a better fit for a naturally-aspirated engine where you’re turning a high level of rpm.

“When it comes to design and weight considerations it’s easier to make an H-beam rod lighter than an I-beam rod. Some of our H-beam rods are a straight beam, while others are a tapered beam. A tapered beam means you don’t have as much weight on the pin end of the rod. In a high-rpm application, you want to have less weight up on the pin end. When you combine this with a lighter piston, it helps to reduce the tensile stress on the rod itself,” Norris explains.

H-beam rods can help keep stress off of the piston based on their shape.

I-beam and H-beam connecting rods both vary in design features among manufacturers. You want to be sure when you’re looking at a set of rods to use in your build that the features they offer are what you need.

“With an I-beam, depending on the application, you would need to look at whether the rod was a straight up and down design or a tapered design. You would also want to look at the width of the beam itself. The bolt placement on the rod is also important. Bolt placement is key because the head of the bolt needs to be far enough away from the big end bore that it doesn’t have too thin of a cross-section there, because that would allow the bore to flex,” Norris says.

H-beam connecting rods have some additional things you want to look at before you pull the trigger on a set, according to Norris.

“With an H-beam rod you should look at the thickness of the blades; basically, the H-beam itself where the slot is cut out. Depending on the material, you would want at least .900-inch of thickness in that area. Now, you can reduce that thickness when you get into some of the higher-end materials. The thickness in the center of the rod between where the slots are cut out needs to have a certain minimum thickness as well based on your application.”

How Callies Approaches I-beam And H-beam Connecting Rods

Callies has always put a good amount of time into the design process of its connecting rods. There are many different factors that are considered before the pen is even put to paper, and this approach is used to ensure the final product performs at a high level. This process has led Callies to design its rods in a similar fashion, with similar cross-sectional thicknesses so the rods are as successful as possible.

The big end of the rod is one area where I-beam and H-beam connecting rods differ in design.

“Between an H-beam and an I-beam, I would say there are areas of the rods that are basically identical. That would be between the big end bore and the inside edge where the alignment sleeve where the bolt goes through. Those thicknesses would be consistent between an H-beam and I-beam rod. Similarly, the thickness between the outside of the bolt alignment sleeve and the outside of the rod would be the same,” Norris explains.

When it comes to design and weight considerations it’s easier to make an H-beam rod lighter than an I-beam rod. -Nick Norris

Since I-beam and H-beam connecting rods are used in different engine applications they do need to have some different features added to their designs. These features have to be added based on the fundamental nature of the rods themselves, to ensure they won’t fail when they’re running hard inside a high-performance engine.

“Where things become different between the two connecting rods is when you get above the bolt from the big end bore to where the rod transitions into the beam leading up to the wrist pin. In this area, the I-beam will typically have a little bit less of a cross-section because it doesn’t have that H-beam intersection where the H-beam slot cuts through that area. With the I-beam, we still have the same minimum cross-section from the edge of the pocket to the edge of the beam itself; it would also have a minimum thickness on the pocket depth,” Norris says.

It doesn’t matter what kind of engine you’re building Callies had a rod for you.

Having a connecting rod with a good design will only take you so far, the rod also has to be machined properly to avoid any issues. Callies uses a very intense set of processes to ensure all of its connecting rods are perfect. This includes spending a lot of time creating programs to machine the rods without humans touching them.

“We don’t do any handwork on our rods at all — the rods aren’t touched up by hand. We spend a lot of time on tooling and proper fixtures to prevent that. There are ceramic brushes we use to smooth out the hard-to-reach areas, plus shot-peening and other vibratory processes. When there’s handwork done it can take away from the consistency of the finish — by using machines we eliminate that,” Norris says.

Selecting the right connecting rods is one of the most important things you will do when setting up an engine build. Knowing the difference between I-beam and H-beam rods and their best uses will help you get the right rod for the job to get you through run after run, season after sea

Posted on Leave a comment

The Basics of Protective Driver’s Gear

In high-performance driving, safety should be at the center of every decision made and action taken. If safety is not dictating each decision made on the track, it should be. That becomes even truer when considering the safety gear, including helmets, driver suit, gloves, and shoes.

Where hitting another car or a stationary object is inevitable, the last line of protection for any driver is their safety gear. A race car protects a driver from the most significant impacts that usually happen when it first makes contact with another object. A driver’s safety gear is designed to protect the driver from excess energy not otherwise absorbed or dissipated by the chassis, or from any secondary collisions to parts of the car already damaged by contact.

For novice high-performance drivers, the choice of safety gear can be confusing and intimidating. A wide variety of safety ratings are legal for use in many amateur racing organizations. Still, more established manufacturers offer higher quality equipment that is more durable, fits better, and provides more protection. We will walk through the basics of safety gear to provide the information needed to make the best choices for your budget while keeping you safe on the track.

Bell Racing

Helmets should be purchased from highly-reputable companies with a proven track record, like this Bell RS7, with custom paint by Don Johnson at Airbrush Gallery.

Helmets

Helmets sold in the United States designed for motorsport can carry ratings from up to three independent organizations: the SFI Foundation, Snell Memorial Foundation, and FIA (Federation Internationale de L’Automobile). SFI and Snell safety gear standards are used primarily in the U.S., while FIA standards are used by multiple sanctioning organizations from around the world. No one-rating system is better than the other, but often rate different aspects of helmet performance. Ideally, whichever helmet you purchase will carry ratings from at least one of these organizations. So, what do all those letters and numbers really mean?

The most widely used helmet standard in the U.S. is from Snell, which tests a helmet’s resistance to impacts, punctures, and flame. The organization’s standards are updated every five years, with specific tests often added to more closely match real-world needs during each five-year cycle. Manufacturers seeking certification submit production samples of current and new helmet models at the outset of each five-year period. Those samples are subjected to the organization’s stringent testing procedure at the beginning of each new certification cycle.

The leading letters of the Snell certification refer to the type of helmet, including ‘SA’ (Specialized Application for auto sports), ‘EA’ (Elite auto sports), ‘CM’ (Children’s Motorsports), ‘M’ (Motorcycle), and ‘K’ (Karting). SA and EA have flame-resistant linings and structures designed to withstand the crash forces experienced in a closed- or open-cockpit racecar. The CM, M, and K helmets do not have flame-resistant linings and are constructed to perform best in its specifically-rated application.

The first year of the new certification cycle for which the helmet was tested follow the application. An SA2015 rating means the helmet surpasses the performance standards required of a SA helmet manufactured to the 2015 requirements. Depending on the organization in which you drive, most allow the use of helmets with the current or immediately proceeding certification.

Snell SA2015

The Snell certification sticker is located inside the helmet, usually behind some liner material.

The FIA follows similar helmet certification methods, conducting tests similar to Snell. However, it does not dictate a specific period in which certification standards are reviewed. Most helmets currently on the market surpass the 8859-2015 standard, which requires helmet makers to incorporate mounting hardware for anchor posts used by frontal-head restraint systems.

The most recent standard (8860-2018) includes updates further raising the bar of performance during a race-related impact. Manufacturers are not required to build all helmet models to the latest standard; instead, the certifications allow individual sanctioning bodies the option to require whether or not its drivers use helmets with the newest spec.

FIA 8859-2015              Certification

The FIA certification sticker is located inside the helmet, usually behind some liner material.

Less widely utilized, SFI specifications also include performance standards for impact performance of helmet shells and flame-resistant interiors. Like the FIA, SFI standards do not include a specified timeframe like the Snell certification model. The current 41.1 spec provides minimum performance standards for fire-resistant helmets used in auto racing that went into effect in 2013 and were reviewed in 2014.

Frontal Head Restraint (FHR) Systems

This category refers to all devices that prevent injury by limiting the extreme forward movement of a driver’s head in a collision, including a deadly basilar skull fracture. The HANS Device was the original answer to prevent these injuries, but SFI and FIA currently certify various FHR designs. SFI’s 38.1 spec has been the most open to FHRs other than the HANS, including Hybrid, NecksGen, and other alternatives. However, in recent years, FIA has widened the number of devices it certifies. Be sure to pay close attention to the rules of your racing organization to understand better which FHR systems are permitted.

A head and neck restraint is necessary when you have a car outfitted with a safety harness. This is the HANS III, but there are many different styles of FHRs with different ways to attach them to the helmet.

Flame-Resistant Garments

These items include driver’s suits, gloves, shoes, socks, balaclavas, and flame-resistant underwear. Like FHRs, both SFI and FIA also have specific specs and requirements for these items. FIA’s latest standard (8856-2018) has separate protection requirements for each clothing item. Each piece is also mandated to include the manufacture date and is valid for ten years after that time. SFI requirements for undergarments, socks, shoes, and gloves fall under spec 3.3.

Most mass-produced racing suits fall under the 3.2A spec. But, within this spec are five subcategories outlining different levels of protection. A 3.2A/1-rated suit provides three seconds of protection until the wearer receives a second-degree burn.

The certification label will be affixed to the garment, such as these from RaceQuip. Depending on your level of racing, you may need to wear multiple layers or upgrade to a thicker suit. Even with a 3.2A/5-rated suit, it is a good idea to wear flame-resistant undergarments as well. Every second counts in a fire!

The next-most-common suit rating is the 3.2A/5, providing ten seconds of protection. For ratings other than those, multiply the final number to get the approximate protection time. It is also important to remember flame-resistant undergarments add approximately three additional seconds of protection when worn under a driver’s suit. So, even if your sanctioning body does not recommend flame-resistant underwear, it is a good idea to consider using these items because they represent a cost-effective level of additional protection.

Safety Equipment

Driver’s gear including, driving suit, helmet, flame-resistant socks, gloves, and flame-resistant underwear.

Last Lap

There is no getting around that safety equipment is a sizable investment in high-performance driving. Many variables, including budget and level of racing, must be taken into account when purchasing driver’s gear. However, cost should not be the sole determining factor. Fit and feel of driving gear are most important above everything else, especially when it comes to helmets. Without feeling safe and comfortable, a driver will not be able to exploit their full performance potential.

Posted on Leave a comment

Lucas Oil Safeguard Ethanol Fuel Conditioner

Lucas Oil Releases Safeguard Ethanol Fuel Conditioner

New from Lucas Oil – their Safeguard Ethanol Fuel Conditioner with Stabilizers. This conditioner was made to specifically address and correct issues that arise after using ethanol-based fuels. See more details below.

Official Release:

Lucas Safeguard Ethanol Fuel Conditioner with Stabilizers was made to specifically address and correct issues that arise after using ethanol-based fuels. The Fuel Conditioner has many practical applications, such as cleaning injectors, intake valves, combustion chambers and other critical fuel components. Additionally, Safeguard stabilizes fuel and prevents varnish and gum formation in ethanol and gasoline.

Lucas’ proprietary Safeguard formula works to combat deposits and protects engines from the harmful effects of alcohol combustion. Completely soluble in all ethanol fuels, Safeguard contains effective additives to prevent rust and corrosion, and will not harm filters.

“Safeguard is one of our signature products,” said Greg Hewgill, Technical Director, Lucas Oil Products. “We feel that its multifaceted uses and dependability speak to our company’s proven track record, always making sure to put the customer’s needs first when developing and introducing new products.”

The fuel conditioner is recommended for all automobile and marine applications and can be used with both two-stroke and four-stroke engines. This applies to E-10, E-15, E-85, pure ethanol and any mixtures in between (including gasoline).

Features:

  • Cleans injectors, intake valves, combustion chambers and other critical fuel components.
  • Stabilizes fuel and prevents varnish and gum formation in ethanol and gasoline.
  • Combats deposits and protects engine oil lubricants from the harmful effects of alcohol combustion.
  • Inhibits corrosion.